Welcome!
Felt Flowers Wreath
by Kim
I have been teaching everyone how to make these fun felt flowers. Everyone who can handle a pair of scissors can make these beautifully, kids and adults alike.
Love them! So, I put in a movie this morning and sat to make a few fuchsia flowers for a wreath. I was finished before the movie.
To make a wreath like mine, you need:
This is a version of the same flower, cut using straight scissors. The amazing Helen taught this to me.
To make our wreath:
1. Cut the center from the foam plate. This will be the wreath form.
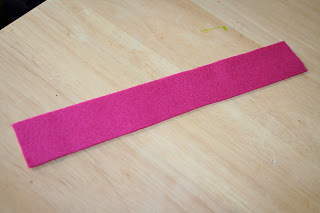
2. Cut 5 strips of felt (cutting the long way) from each felt square. I did not measure, it does not matter if they are exactly the same width. Just cut.
3. Fold a strip in half....
and cut fringe using the pinking shears. The folding in half just offers you the chance to cut two layers at once instead of one. Cut the fringe around 1/4" wide or so, also no measuring allowed. Just cut. Cut close to the edge.
If by chance, you cut through the edge and you end up with a separate piece, no worries. Keep going.
4. Start at one end, and roll. Add a dot of glue every 2" or so. This is just to hold it together as you roll. Perfection not required. If you cut off a piece while you were fringing, just glue it on now, as you are rolling. Try to keep the end flat as you roll. If that does not happen, when you are finished rolling, stick your finger in from the top and push the bottom flat.
5. Open up the flower petals. Cute!
6. Glue your 15 flowers around the wreath form. Glue the blingy buttons to the flower centers. Click on the pic to see a larger view.
7. Optional: Make a few smaller flowers the same way out of your ribbons scraps. I used only 8" pieces for mine. I made 7 and tucked them in between the felt flowers.
8. Feel great. You have recycled a foam plate, and used 100% recycled material felt for your project. And it was really inexpensive!
Is this spurring creative ideas? How will you change the flower? What will you do with it?
Happy Valentines Day and Take Your Vitamin C!


Love them! So, I put in a movie this morning and sat to make a few fuchsia flowers for a wreath. I was finished before the movie.
To make a wreath like mine, you need:
- 3 9"x12" Kunin felt squares: fuchsia (I love that Kunin felt is made of recycled plastic bottles!)
- FabriTac (You know I love FabriTac, especially for making ribbon and fabric rosettes) So much better than a glue gun for me, and it holds instantly!
- a foam plate
- pinking shears
- scissors
- 15 blingy buttons (Blumenthal Lansing makes amazing blingy buttons)
- scraps of ribbon to coordinate (optional)
This is a version of the same flower, cut using straight scissors. The amazing Helen taught this to me.
To make our wreath:
1. Cut the center from the foam plate. This will be the wreath form.
2. Cut 5 strips of felt (cutting the long way) from each felt square. I did not measure, it does not matter if they are exactly the same width. Just cut.
3. Fold a strip in half....
and cut fringe using the pinking shears. The folding in half just offers you the chance to cut two layers at once instead of one. Cut the fringe around 1/4" wide or so, also no measuring allowed. Just cut. Cut close to the edge.
If by chance, you cut through the edge and you end up with a separate piece, no worries. Keep going.
4. Start at one end, and roll. Add a dot of glue every 2" or so. This is just to hold it together as you roll. Perfection not required. If you cut off a piece while you were fringing, just glue it on now, as you are rolling. Try to keep the end flat as you roll. If that does not happen, when you are finished rolling, stick your finger in from the top and push the bottom flat.
5. Open up the flower petals. Cute!
6. Glue your 15 flowers around the wreath form. Glue the blingy buttons to the flower centers. Click on the pic to see a larger view.
7. Optional: Make a few smaller flowers the same way out of your ribbons scraps. I used only 8" pieces for mine. I made 7 and tucked them in between the felt flowers.
8. Feel great. You have recycled a foam plate, and used 100% recycled material felt for your project. And it was really inexpensive!
Is this spurring creative ideas? How will you change the flower? What will you do with it?
Happy Valentines Day and Take Your Vitamin C!


Labels:
felt flowers,
rosettes,
wreath
Subscribe to:
Post Comments (Atom)
Visitors
Contact Me:
kballor@aol.com


10 creative thoughts:
I would like to invite you join my blog party "Being Creative" starting today. I hope you join in!
Blessings,
Tricia
http://diyhshp.blogspot.com/
Leave a Comment