My Sheep Hear My Voice....

 Chair painting. Love it!


If you have never done, give it a try! It is an inexpensive project. Pick a chair you already own or one you find at the curb, free.  Craft paint is inexpensive. You really then just need a couple of nice brushes, a can of clear glaze, and an idea. A painted chair is a handmade project that will last a long time, could even be an heirloom.


Take your Vitamin C and start painting...


Skip To My LouTip Junkie handmade projects

Funnier Than Baseball

I am watching the Tigers and surfing...and came across an article on Book Spine Poetry. I was intrigued and laughing, so I hopped right up off the couch and looked through my bookshelves to see what I could build.


Here is my first art installation of book spine poetry........


Even though the Tigers are not losing, that was pretty entertaining for me.  


Use your Vitamin C and try it. What do you have?


You Will Want These Beads!

 Remember my friend She Who Has the Best Vintage Beads?  Here is another necklace I made for her from some of her beads.


I had fun working with these little flowers. Cute, right? Sometimes plastic beads are just what the jewelry doctor ordered!


Use Your Vitamin C!

Flap Your Wings Blog Hop

flapyourwingsbloghop1.jpg


Today is the Flap Your Wings Design Challenge - Blog Hop. Two points to this challenge are to honor the artist Judy Glende, and to rise money for charity in her name. 

I made this pendant. It is for sale in my Etsy shop. Proceeds from the sale of my pendant will go to my charity, CBC Divine Design. You will find the details of DD's current project on the same Etsy page where you find the pendant. I believe the money that comes from the sale of this pendant will be put to very good use.

Then, make a cup of tea, sit, and visit the blogs of the rest of the artists participating in this challenge/hop:


8. Kim Ballor 


11. Lana Kinney 

12. Kym Hunter 


See how we all used our Vitamin C!

3 Things I Don't Punch Everyday and Some Projects With Them


This was a challenge to myself to use three materials that are not in my everyday range. They might be in yours, in which case, I would love to see what you make with them! 

I have been very punch inspired lately, going in all directions. It started with decorating artist canvases and moved onto lighted wall art. Then I was inspired to see where else punches could go.

Paper punches are designed to punch paper and for the most part, we use them on scrapbook paper and cardstock. I used the same scalloped round punch for each of my challenge projects. Scallop punch in hand, I walked through my studio, house, and garage, sticking things in the punch to see what might work.

These are the first three materials that jumped out at me, and the simple projects I did with them. 

I offer quick instructions. Maybe they will entice you to try them... or take your own paper punch around the house testing.....

1.
A textbook nobody would buy back.


 Punch 8 textbook flowers and one white cardstock flower.


 Fold each textbook flower in half and in half again.


 Put a dab of hot glue in the center of the cardstock flower. Place 4 folded pieces with points in the glue. Repeat with remaining four flowers, offset from the first layer.


 Glue a button or gem in the center. Glue a pinback or magnet to backside. These are practically free to make! 


 2.
Window Screen

 Punch out 4 or 5 flowers of screen and one of red cardstock.


 Stitch all layers together with a button in the center. Bend up some of the screen flower edges. Excellent texture!


 Use for any decoration. I like it dressing up this small gift box. 


3. 
Freezer Paper

 Punch out five freezer paper flowers. Iron them (shiny side down) to the leg of a pair of jeans. Place duct tape (mine is white), around them forming a box of denim with 5 paper flowers inside.


 Cover the exposed denim with bleach from a Clorox Bleach Pen. I used the widest tip on the pen, and brushed from the paper onto the denim to keep the edges crisp.


 It takes awhile for bleach to work on denim. I let mine sit overnight before I removed the tape and the freezer paper flowers.


 Squiggle around them with dimensional fabric paint. I used white, but a color would be interesting too.

As a crafter/designer, I am required to use both right and left brain to complete a job. A good project needs clear instructions (left brain), but a creative, innovative project (right brain) starts the process. When I get deep into the left brain activities of writing, invoicing, mailing, etc, I find a challenge a good way to keep the right brain exercised. Even a simple challenge is a terrific way to stay fresh.


Have you challenged yourself lately?
Use your Vitamin C!
Skip To My LouTip Junkie handmade projectsHookingupwithHoH

Super Trimmers and Dress Forms

 While I have never been super girlie, I am having a crush on dress forms. They seem to be available everywhere. Very trendy. I got this one at Michaels with a 50% discount, making it twice as much fun.


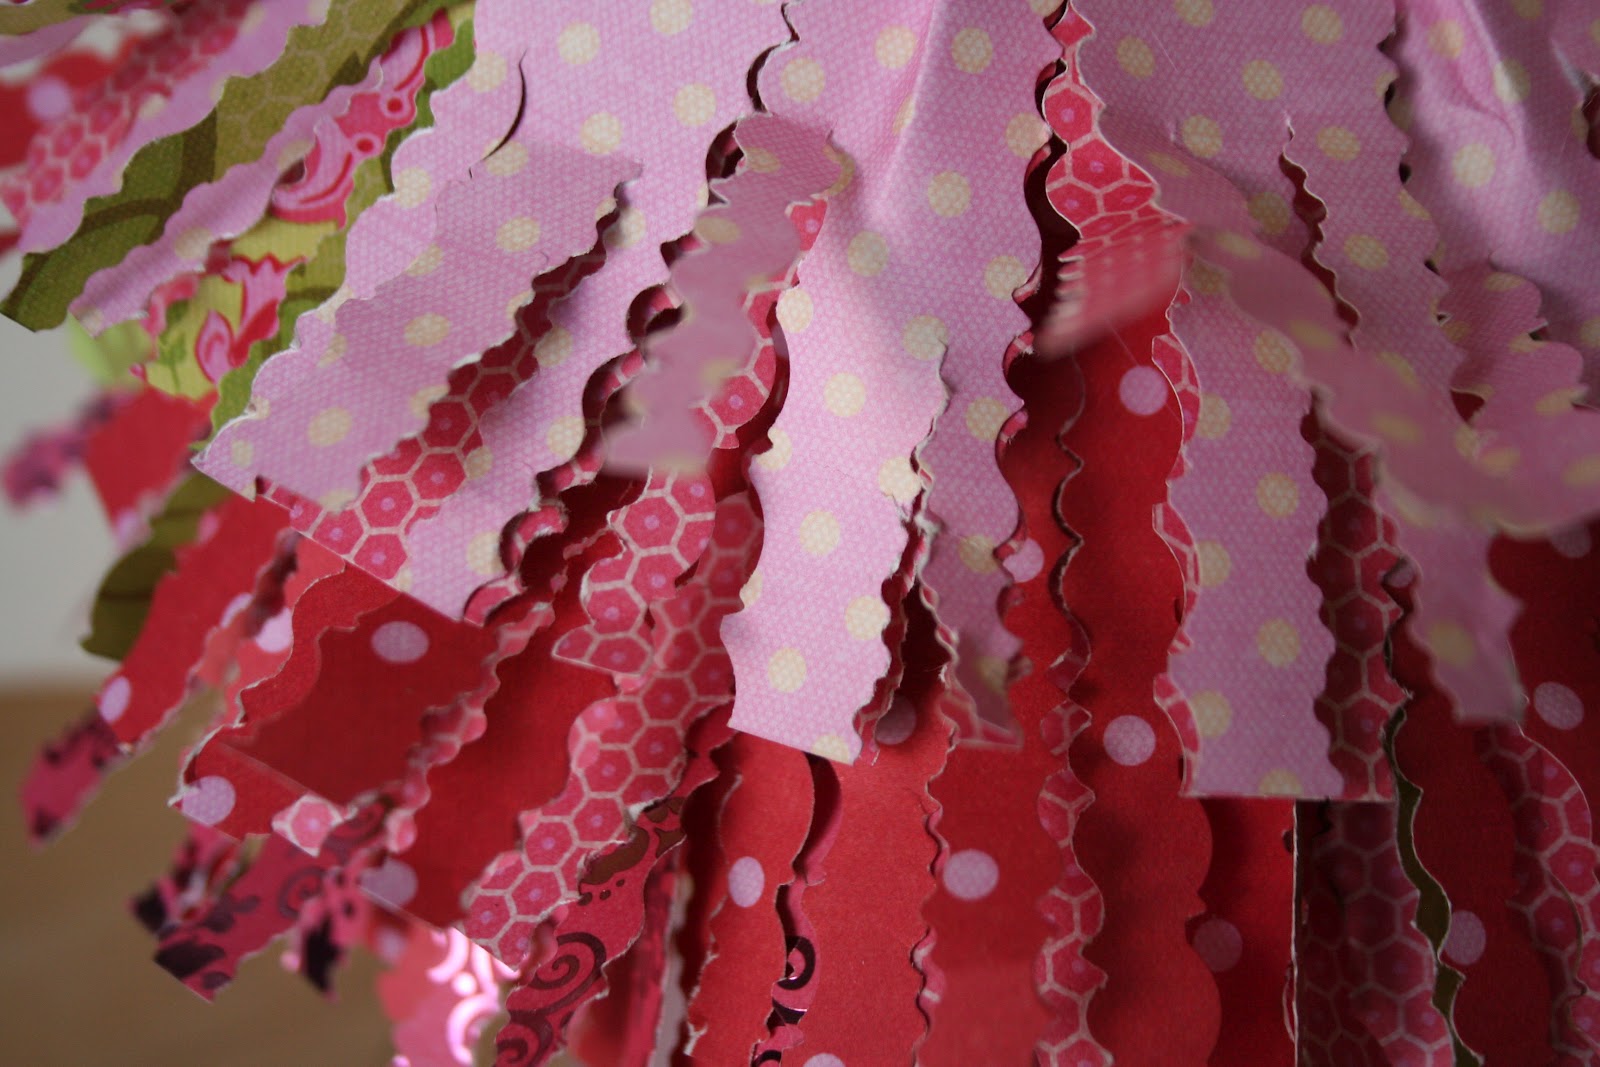
I love tools, don't you? For this project, I built my own tool. I wanted fringe cut with different paper edgers, but did not want the long process of using three pair of scissors. I hooked them all together so I could make three cuts at once.


To build my tool, you need:
  • 3 pair of Paper Edgers, your choice
  • duct tape
  • craft wire
  • 4  6mm beads of any kind
  • wire cutters

Try this:
1. wrap a piece of duct tape around scissors to hold them together.


 2. Cut a 12" length of wire, fold in half. Place the fold at one outside edge of handles. Twist two wires together twice. String one bead. Twist wires twice again. Sandwich second handle between wires and repeat twisting and bead stringing between second and third pair. Sandwich last handle between wires and twist together on outside of handle. Trim wires.


Repeat on bottom handles. Remove tape.


Awesome. Super trimmer!


To dress the form, you need:
  • your super trimmer
  • scrapbookpaper: 3-4  12" x 12" pieces that coordinate
  • wire dress form
  • hot glue gun and glue
  • ruler
  • pencil
  • straight scissors 

 Try this:
1. Stack two pieces of paper together. Measure and cut strips 3 1/2" wide. Cut in from one edge with super trimmer, across the entire edge,  as far in as paper edgers will reach. 


 2. Glue small folds or tucks, about an inch apart along straight edge of papers (still holding them together). This curves your strip slightly.


 3. Glue paper fringe around dress form, lower than waist. This will be the bottom layer of three. It took two 12" lengths to go around my dress form.


 4. Repeat steps 1-3, glueing each layer a little higher on the dress form. The third layer should be at the waist.


 5. Fluff out the layers.


 The different cuts gives your skirt fabulous visual texture. So cute!


 6. Use two bracelets you already own, or take this excuse to string two new bracelets. 


 Place them around the waist of the dress form. They provide bling and a place to store a couple bracelets!


If your dress form has additional hooks at the top, use it to hold additional jewelry. I added another bracelet, also made of paper.


Adjust the process according to the design of your dress form, and the colors you like.


My super trimmer is still intact. Who knows when I might need it again?? 


Use your Vitamin C!
Skip To My LouTip Junkie handmade projects

Related Posts Plugin for WordPress, Blogger...

Visitors

Contact Me:

kballor@aol.com