Welcome!
Showing posts with label necklace. Show all posts
Pink and Black Necklace Re-Do
by Kim
I made this necklace many years ago. The construction is embarrassingly simple. The base is some twisted black cords held together by endcaps. The beads and charms are attached by tieing them on with black embroidery floss. Simple. No tools required (well, scissors), and it has held up for years.
But when I wear it, it bugs me. It never looks right to me on any neckline. The beads don't flow up the necklace far enough to suite me.
So, I made some more beads and tied them on. I like it so much better looking fuller!
This is a good technique to spruce up an old necklace or one you purchased that you are tired of. Just add a few more beads.
Use your Vitamin C!
But when I wear it, it bugs me. It never looks right to me on any neckline. The beads don't flow up the necklace far enough to suite me.
So, I made some more beads and tied them on. I like it so much better looking fuller!
This is a good technique to spruce up an old necklace or one you purchased that you are tired of. Just add a few more beads.
Use your Vitamin C!
Labels:
jewelry,
jewelry design,
lampwork beads,
necklace,
redo
Pink Necklace Re-Design
by Kim
This necklace was destined to be re-made. It is something I do. I highly recommend it. Sometimes I don't like what I did. Sometimes I get tired of a piece. Sometimes I don't really like some of the beads in the piece as much as I thought I would. This necklace won the trifecta. All of the above.
I remember making it, it has been quite a few years. I was sitting in my friend Joann's kitchen. The necklace got worn once and it has been hanging on a hook since then. Look how tarnished the silver is.
So, it got a re-do today. I cut it all apart and put away the beads I didn't like anymore.
The bali silver needed a clean up, and I could not find s sunshine cloth. So, I took them to the bathroom sink and rubbed them down with toothpaste. There is just enough abrasive in toothpaste to remove the tarnish. Just put some in your hand and rub. And they smell minty fresh!
Here is the re-design. It is a little longer, a length that I wear better than a choker length. I kept the asymmetry without the busyness.
All of the discs give it a slight Jetson-ish feel. I think I will wear the re-designed version. And if not, I will take it apart and try it again.
Just takes a little Vitamin C.
I remember making it, it has been quite a few years. I was sitting in my friend Joann's kitchen. The necklace got worn once and it has been hanging on a hook since then. Look how tarnished the silver is.
So, it got a re-do today. I cut it all apart and put away the beads I didn't like anymore.
The bali silver needed a clean up, and I could not find s sunshine cloth. So, I took them to the bathroom sink and rubbed them down with toothpaste. There is just enough abrasive in toothpaste to remove the tarnish. Just put some in your hand and rub. And they smell minty fresh!
Here is the re-design. It is a little longer, a length that I wear better than a choker length. I kept the asymmetry without the busyness.
All of the discs give it a slight Jetson-ish feel. I think I will wear the re-designed version. And if not, I will take it apart and try it again.
Just takes a little Vitamin C.
Labels:
jewelry,
jewelry design,
lampwork beads,
necklace,
re-design
I Love My Magical Crimp Tool!
by Kim
I don't usually do subtle in jewelry, and this necklace is no exception. Click on the pic to see the variety of beads in this necklace.
No sure how I got on this, but I have been thinking how many partial tubes of seed beads I have. Probably most beaders do. They are useful, but apparently only until they get right down to the bottom. And, so, I made A LOT of seed bead rings. There are rings of all size seed beads, triangle beads, hex beads, and some small crystal beads. The rings range from 1/2" to 1 1/2" in size.
I went through the drawer and took out all of the green beads I had. Then I added a couple turquoise beads to add a touch of brightness.
My Magical Crimping tool got a good workout. I love that thing. Do you have one? I lost count of the rings around 120. Probably there are close to 200 rings on the necklace. The process took me a couple movies.
When all the rings were completed, and there were some empty seed bead tubes, I used embroidery floss to knot groupings of the rings to the links of a chain necklace. That part of the process was pretty fast. I even added a couple of small charms. You could add as many as you want.
I saved a couple smaller rings to go on the ends, so it is a bit tapered and looks better around the neck.
It is definitely a 3D necklace! Made of leftovers!
Use your Vitamin C....
No sure how I got on this, but I have been thinking how many partial tubes of seed beads I have. Probably most beaders do. They are useful, but apparently only until they get right down to the bottom. And, so, I made A LOT of seed bead rings. There are rings of all size seed beads, triangle beads, hex beads, and some small crystal beads. The rings range from 1/2" to 1 1/2" in size.
I went through the drawer and took out all of the green beads I had. Then I added a couple turquoise beads to add a touch of brightness.
My Magical Crimping tool got a good workout. I love that thing. Do you have one? I lost count of the rings around 120. Probably there are close to 200 rings on the necklace. The process took me a couple movies.
When all the rings were completed, and there were some empty seed bead tubes, I used embroidery floss to knot groupings of the rings to the links of a chain necklace. That part of the process was pretty fast. I even added a couple of small charms. You could add as many as you want.
I saved a couple smaller rings to go on the ends, so it is a bit tapered and looks better around the neck.
It is definitely a 3D necklace! Made of leftovers!
Use your Vitamin C....
Labels:
beads,
jewelry,
jewelry design,
necklace,
seed beads
Button Pendant Gives Back
by Kim
You know that I love it when artists use their gifts to encourage or help others. This story is on the Amazing Helen's blog today. For us, her readers, it serves two purposes. It encourages us to encourage others. And it gives us a great project!
Here are some other encouraging projects and artists.
- Read about Craft Hope if you don't know about it. You might want to participate in one of their projects.
- 7000 bracelets
- Everything is Ticketyboo!
- Flip flops and felt
Word of the day: encourage. Use it in a sentence today with your Vitamin C!
Labels:
artist giving back,
Blumenthal Lansing,
buttons,
jewelry,
necklace,
pendant
The Language of Beads
by Kim
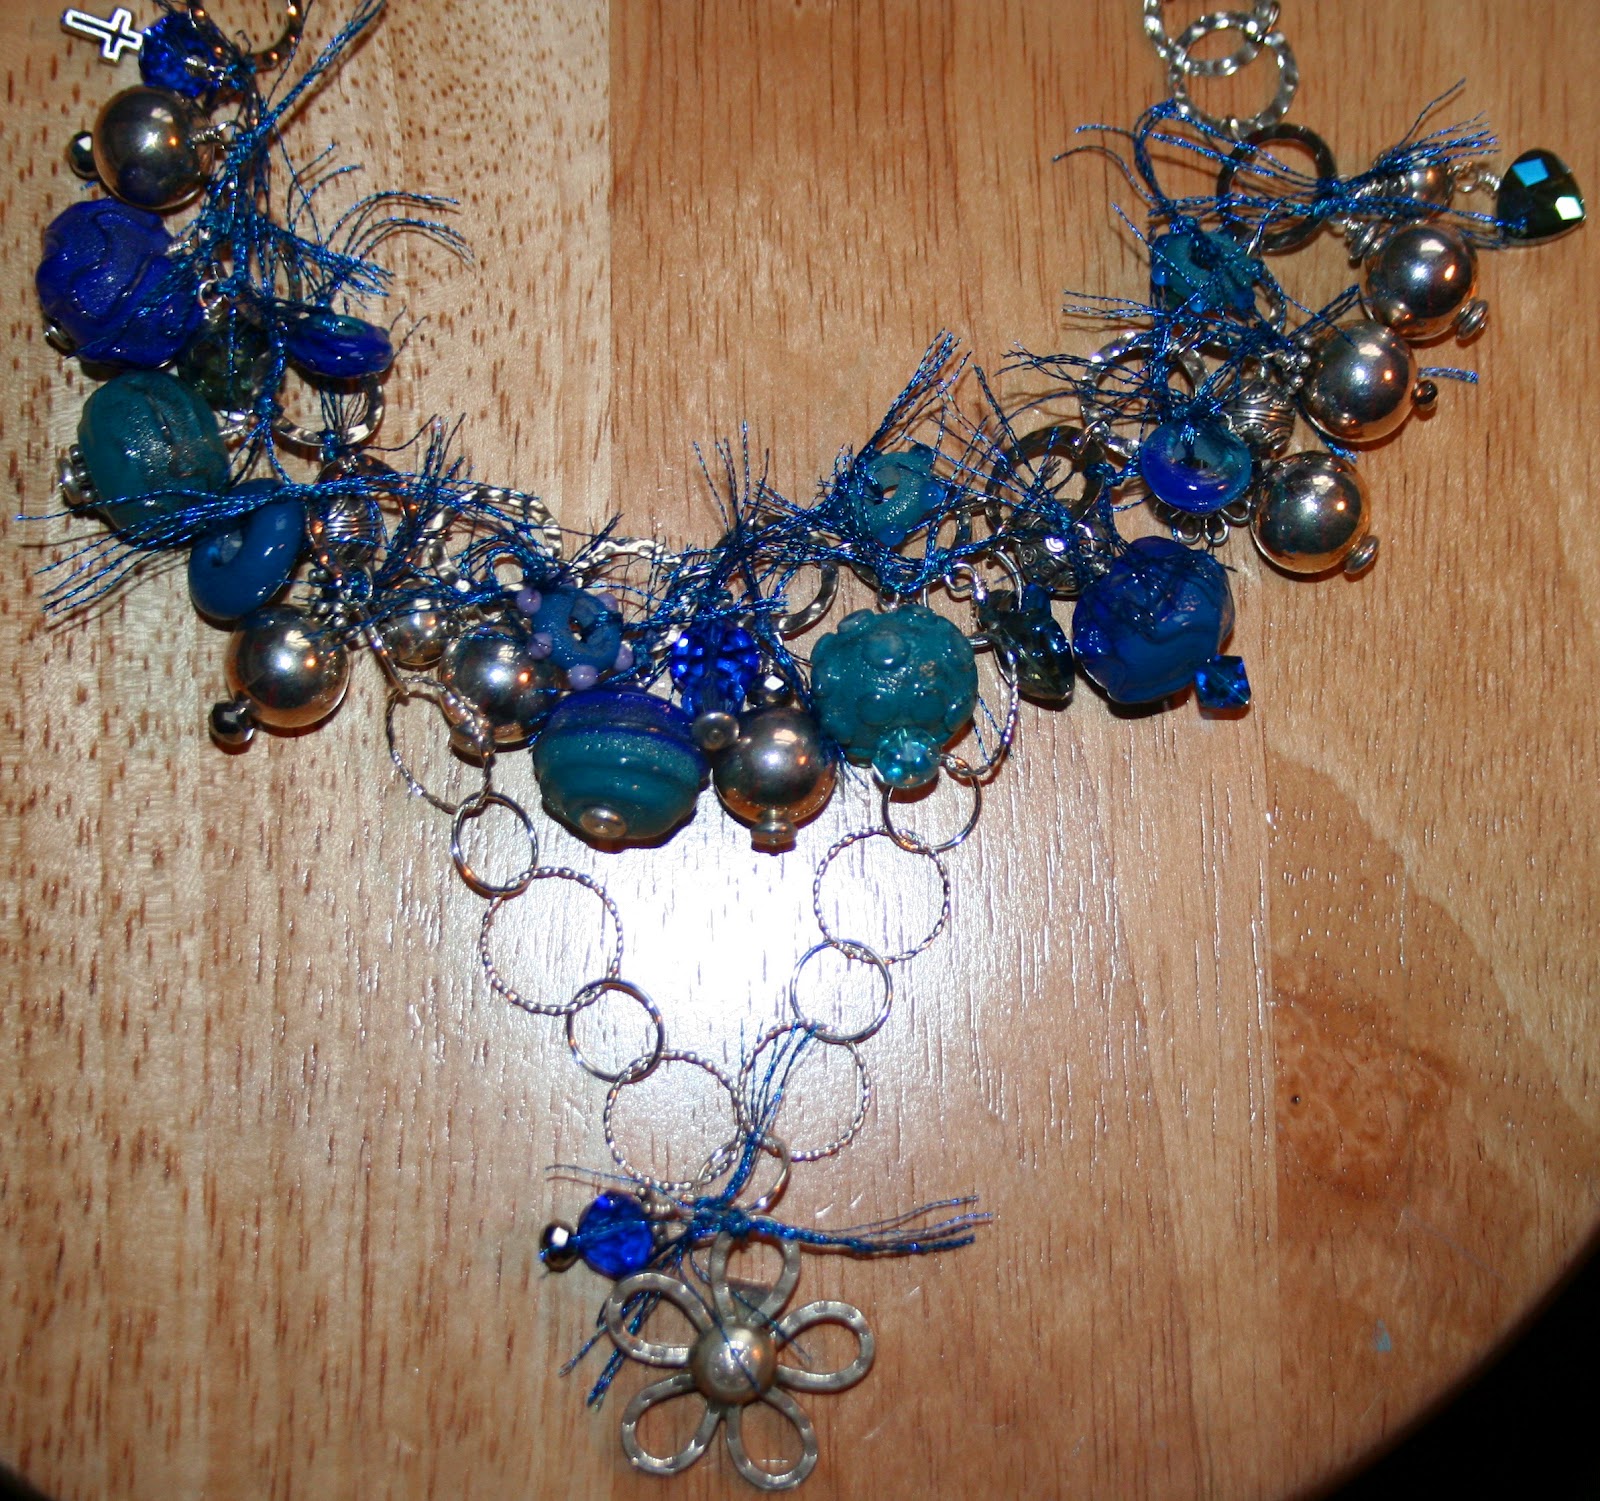
If you do not speak the language of beads, allow me to translate. This necklace says "thank you!"
I was commissioned to make a piece for the Director of Women's Ministries at my church, who I also count as a friend. Our women's ministries programs are meaningful and wide reaching. To say thanks, we gave her this necklace. It is not enough, but hopefully it is a start to letting her know we appreciate her and all she does for us.
I enjoy designing and making a piece for someone I know, especially if it is a gift that is expressing thanks. Working on it gives me a chance to think about and pray for that person. It becomes personal.
When I started thinking about what she might like, these blues came to mind. I don't often enamel my beads, but when I mixed colors on these, they turned out nicely. I made the beads with clear glass, and did not cover the beads completely with enamel. There are places, you can see into the bead. There is a nice mixture of texture and depth of color.
Thank you to our fabulous leader who uses her Vitamin C everyday!!
I was commissioned to make a piece for the Director of Women's Ministries at my church, who I also count as a friend. Our women's ministries programs are meaningful and wide reaching. To say thanks, we gave her this necklace. It is not enough, but hopefully it is a start to letting her know we appreciate her and all she does for us.
I enjoy designing and making a piece for someone I know, especially if it is a gift that is expressing thanks. Working on it gives me a chance to think about and pray for that person. It becomes personal.
When I started thinking about what she might like, these blues came to mind. I don't often enamel my beads, but when I mixed colors on these, they turned out nicely. I made the beads with clear glass, and did not cover the beads completely with enamel. There are places, you can see into the bead. There is a nice mixture of texture and depth of color.
Thank you to our fabulous leader who uses her Vitamin C everyday!!
Labels:
beads,
jewelry,
lampwork beads,
necklace
You Will Want These Beads!
by Kim
Remember my friend She Who Has the Best Vintage Beads? Here is another necklace I made for her from some of her beads.
I had fun working with these little flowers. Cute, right? Sometimes plastic beads are just what the jewelry doctor ordered!
Use Your Vitamin C!
I had fun working with these little flowers. Cute, right? Sometimes plastic beads are just what the jewelry doctor ordered!
Use Your Vitamin C!
Flap Your Wings Blog Hop
by Kim

Today is the Flap Your Wings Design Challenge - Blog Hop. Two points to this challenge are to honor the artist Judy Glende, and to rise money for charity in her name.
I made this pendant. It is for sale in my Etsy shop. Proceeds from the sale of my pendant will go to my charity, CBC Divine Design. You will find the details of DD's current project on the same Etsy page where you find the pendant. I believe the money that comes from the sale of this pendant will be put to very good use.
Then, make a cup of tea, sit, and visit the blogs of the rest of the artists participating in this challenge/hop:
1. Tania Spivey
8. Kim Ballor
10. Sandra McGriff
11. Lana Kinney
12. Kym Hunter
13. Terri Wlaschin
14. Ginger Bishop
16. Kelli Jacobson
18. Deana Hager
19. Erin Siegel
21. Lynne Bowland
22. Alicia Marinache
23. Pam Ferrari
25. Joanne Tinley
26. Shanti Johnson
27. Lorelei Eurto
29. Shelly Joyce
30. Marlene Cupo
See how we all used our Vitamin C!
Labels:
blog hop,
creative challenge,
lampwork beads,
necklace,
pendant
Faux Enamel Flowers
by Kim
I love retro enamel flower jewelry. The bright color and bold design appeal to me, not to mention the shine. My own crafting style tends toward all three of those things, and I am a jewelry designer, so....perfect fit! Nice metal, retro flowers are not easy to find, nor are they inexpensive. So, what does a smart crafter do? She makes her own faux version of them, of course!
A little sidebar: I enjoy combining materials and techniques because I have such a varied past as a crafter/teacher. So, my projects almost always involve combinations of painting, jewelry making, papercrafting, stitching, and whatever else is on my mind at the time. Here is a charm bracelet made with a simple 1" round punch. It is never boring!
Making your own faux enamel flowers is quite easy. And fun! Here is what you need:
- heavy paper: I used both 90 lb. watercolor paper and posterboard. They worked equally well.
- cardstock: solid brights
- Fiskars punches: I used a 1" circle lever punch, a heart squeeze punch, 2 sizes of oopsie daisy squeeze punches, and a large scalloped circle squeeze punch
- Plaid's Dimensional Magic in clear
- Mod Podge for paper, or your favorite paper adhesive that will hold with moisture
- white acrylic paint (optional)
- small flat paintbrush (for Mod Podge)
- buttons or gems for flower centers
- hot glue gun and glue sticks
- wire cutters (if you have shank buttons)
Try this:
1. Punch shapes. For every watercolor paper shape you punch, punch two color shapes the same.
2. Using Mod Podge as glue, sandwich a white piece between two color pieces. Brush on a light coat that completely covers the shape.
3. Make dots or stripes on layered pieces with acrylic paint if you wish. I used the end of the brush handle on the heart and a pencil point on the daisy. Let the paint dry before the next step.
4. Lay all shapes on a flat, level surface. Cover each with a coat of Dimensional Magic. Apply straight from the bottle, no brushing is necessary. Let the coat dry 6 hours or so.
5. Assemble flowers by glueing pieces together. You can roll petals up or down before you apply Dimensional Magic.... or now, after one coat. Gently manipulate the paper for dimension.
Apply a second coat of Dimensional Magic on the front. Let dry. Also apply a coat to the backside of the flower. This makes the flower very sturdy.
6. Glue gems or buttons in the centers of the flowers. I used some gorgeous Blumenthal Lansing buttons. Snip the shanks off with a pair of wire cutters before glueing them down.
Build your flowers in layers. Here are some suggestions. One large daisy, two small daisies and a round gem.
One large scalloped round, five 1" circles, a rhinestone button.
Eight hearts, one large daisy, a gold button.
At this point, your flowers are complete and fabulous. Glue on pinbacks, magnets, or add them to a necklace.
To complete a necklace like mine, you will also need:
- silver wire
- embroidery floss
- scissors
- a chain necklace
Cut a 2" piece of wire. Fold in half. Glue to back of flower.
Using a piece of floss, knot the flower wire to the chain. Repeat with all flowers you want on your necklace.
No doubt, it makes a statement! How fabulous for spring and summer?
P.S. Clicking on the photos will enlarge them and give you a close up view.
Use your Vitamin C to make yourself a garden of flowers!
Vintage Bead Necklace
by Kim
Admittedly, I don't know much about vintage beads...except that I like them. My friend, "She Who Owns The Best Vintage Beads" sometimes gives me a broken strand to play with. She owns beads handed down from her Mother and Mother-in-law. I remake the beads into new pieces for her daughters and herself. Great idea, right?
This grouping of beads is left from a double strand, as I recall. Some time ago, I used the bulk of them, and these are what is left. She requested I string them with some silver. I tried to keep the flavor of the stringing while adding a more contemporary, trendy twist.
There are two kinds of beads here, not counting the silver I added. The striated, transparent beads are acrylic with an AB coating. Very cool in person.
The solid beads are foiled and are so lightweight, that I think they are some kind of paper. They are in really great shape if they are paper.
Anyone know something about this type of vintage bead? I don't know for sure, but according to what they looked like before I took them apart, I would say maybe the are from the early 50s.
Vintage beads...fun way to use your Vitamin C!
This grouping of beads is left from a double strand, as I recall. Some time ago, I used the bulk of them, and these are what is left. She requested I string them with some silver. I tried to keep the flavor of the stringing while adding a more contemporary, trendy twist.
There are two kinds of beads here, not counting the silver I added. The striated, transparent beads are acrylic with an AB coating. Very cool in person.
The solid beads are foiled and are so lightweight, that I think they are some kind of paper. They are in really great shape if they are paper.
Anyone know something about this type of vintage bead? I don't know for sure, but according to what they looked like before I took them apart, I would say maybe the are from the early 50s.
Vintage beads...fun way to use your Vitamin C!
Labels:
beads,
jewelry,
jewelry design,
necklace,
vintage
Free Project Instructions: Bird on a Branch Necklace
by Kim
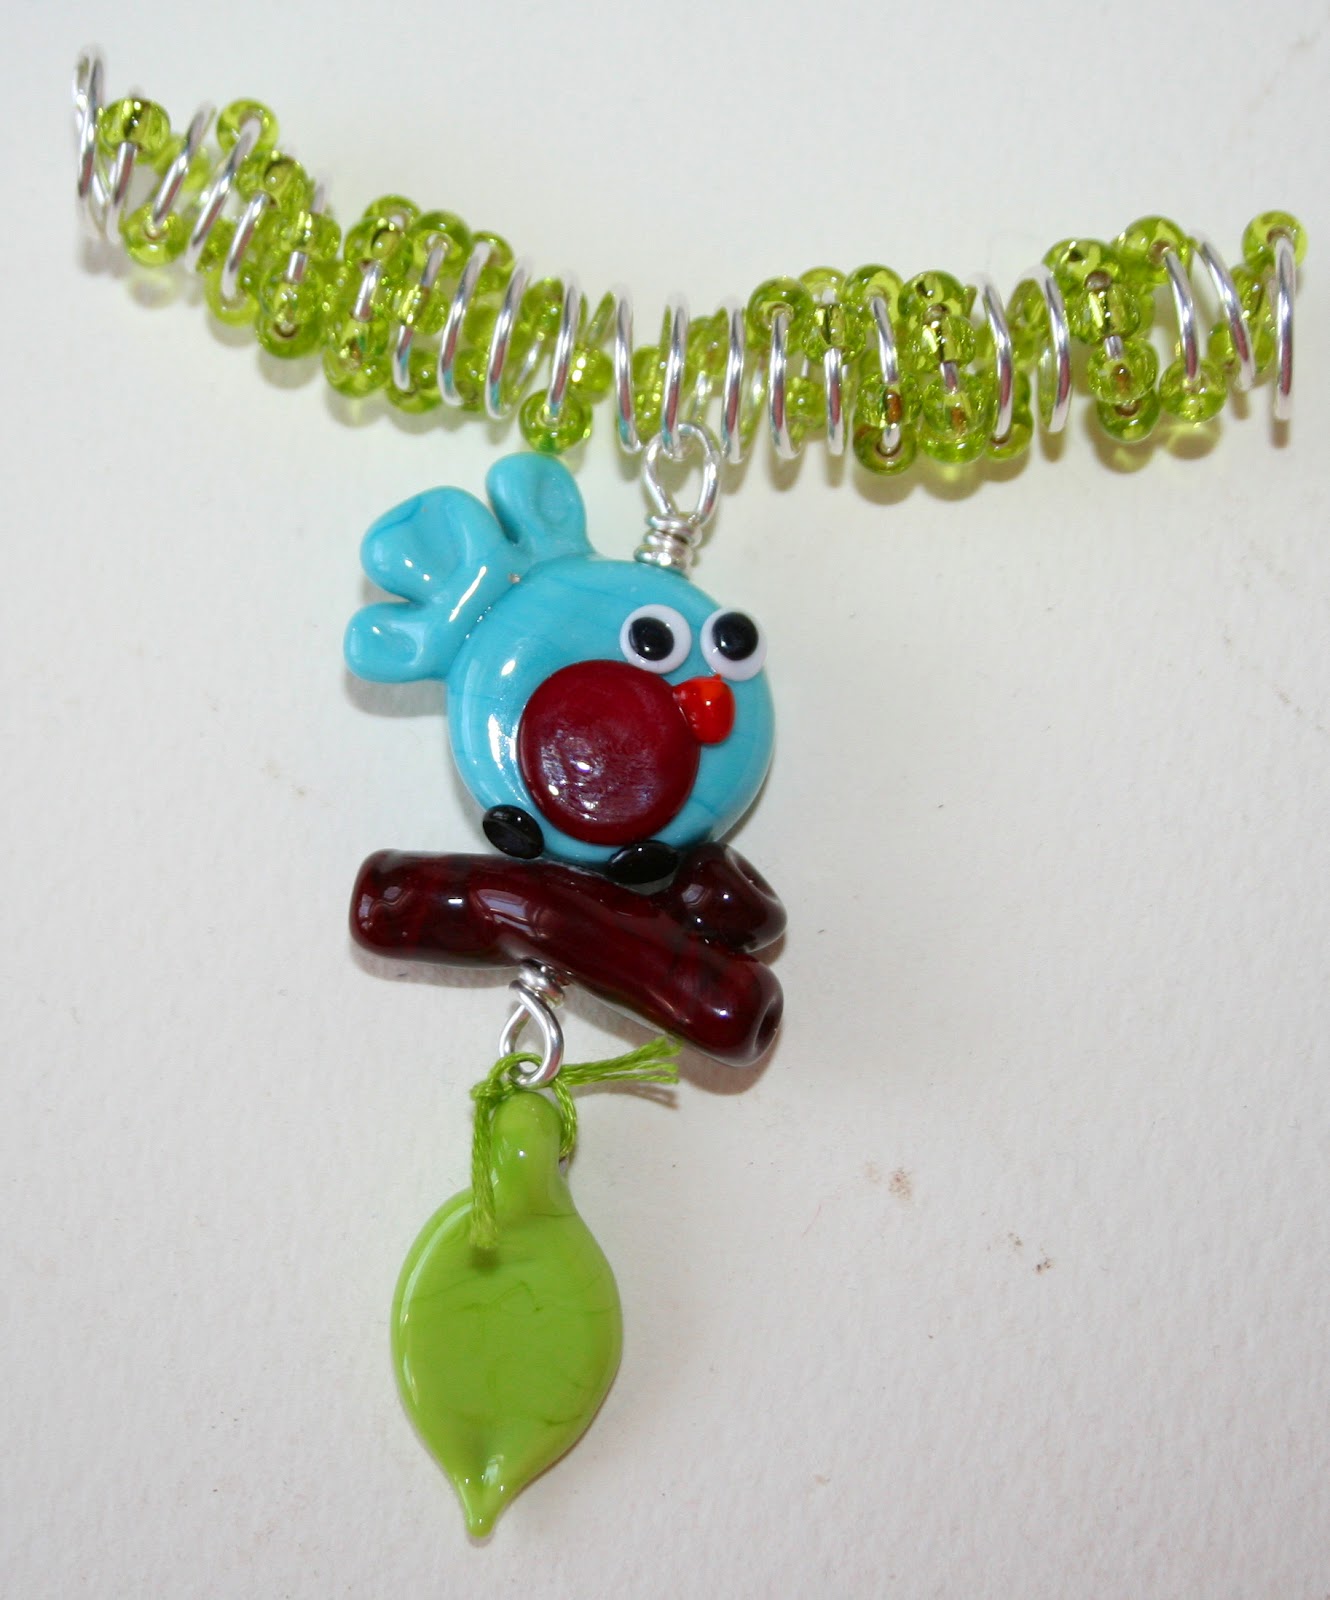
I have been playing with these simple, yet funky little birds. It makes you smile, right? Combined with a branch and a single leaf, they make a nice pendant for a necklace. The only technique you need to know is wrapping a loop. The rest are kindergarden skills.
Supplies you need:
Instructions:
1. Wrap a loop at bottom of 6" length of wire. String on the branch and the bird beads. Wrap a loop at top of beads.
2. Wrap 1 yard length of wire around pen or pencil, forming a long spiral. String bird/branch section on spiral. Wind it on wire to center of spiral.
3. Knot leaf to bottom loop of bird/branch section using floss. Trim floss ends.
4. String several seed beads on both sides of spiral. Wind beads on wire to get desired coverage. Tuck wire ends inside spiral.
5. String ribbon or cord through spiral. Tie around neck at desired length.
Happy spring! If you do something else cute with this set of beads, let me see!
Take your Vitamin C...


![]()

Supplies you need:
- lampwork beads: bird, branch, leaf (find them in sets on Etsy)
- 1 yard plus 6" silver wire, 16 or 18 gauge (I used silver plate wire)
- 6" lime green embroidery floss
- silk ribbon or cord for necklace (mine is on brown silk ribbon)
- size 8 seed beads: transparent lime green
Tools:
- ruler
- flush cutters
- round nose pliers
- scissors
- pen or pencil
Instructions:
1. Wrap a loop at bottom of 6" length of wire. String on the branch and the bird beads. Wrap a loop at top of beads.
2. Wrap 1 yard length of wire around pen or pencil, forming a long spiral. String bird/branch section on spiral. Wind it on wire to center of spiral.
3. Knot leaf to bottom loop of bird/branch section using floss. Trim floss ends.
4. String several seed beads on both sides of spiral. Wind beads on wire to get desired coverage. Tuck wire ends inside spiral.
5. String ribbon or cord through spiral. Tie around neck at desired length.
Happy spring! If you do something else cute with this set of beads, let me see!
Take your Vitamin C...
Labels:
free instructions,
jewelry,
jewelry design,
lampwork beads,
necklace
Subscribe to:
Posts (Atom)
Visitors
Contact Me:
kballor@aol.com